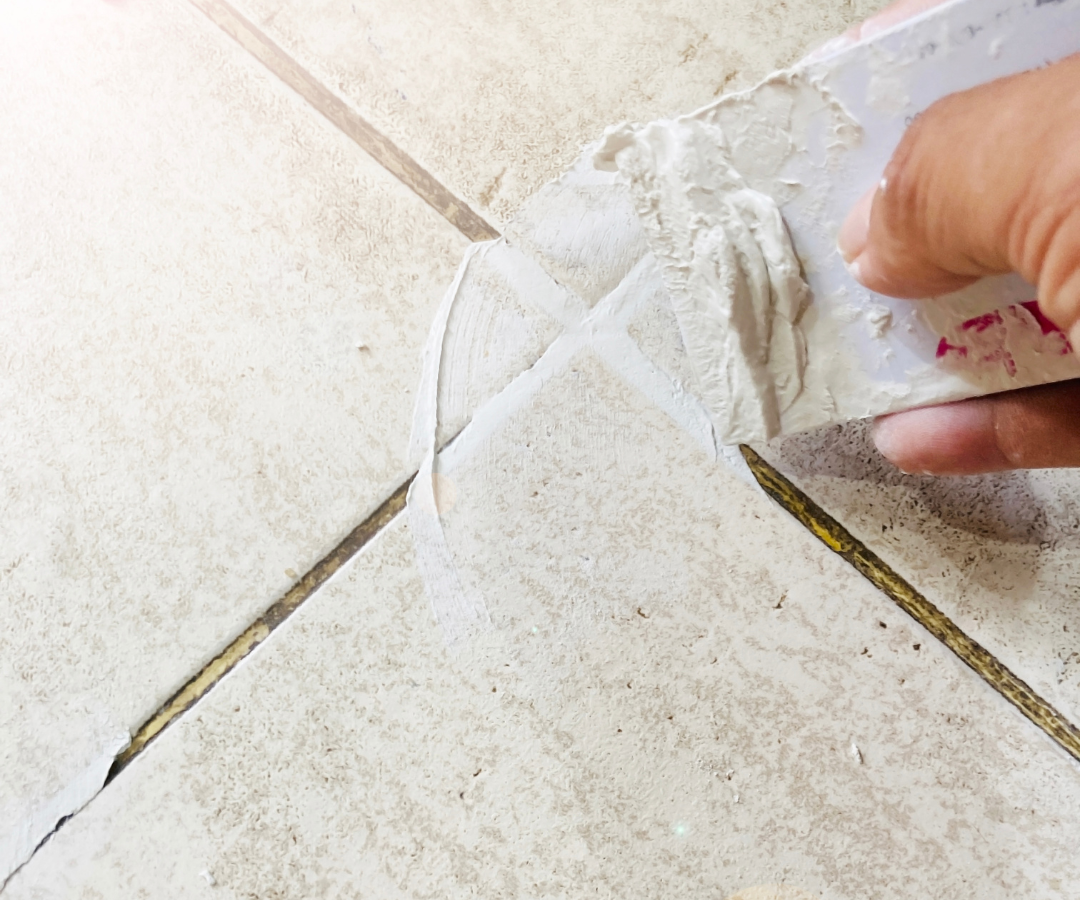
Tile is one of the most durable flooring options you can put in a home—especially here in Tampa Bay, where humidity and moisture make it the go-to choice for kitchens, bathrooms, entryways, and living areas. But there’s one part of a tile floor that trips up almost every homeowner: the grout.
Grout is porous. It stains easily, attracts mold and mildew, and wears down over time if it’s not maintained. A beautiful tile floor can look dingy and neglected simply because of dull, discolored grout lines—even if the tile itself is in perfect shape.
The good news is that grout maintenance isn’t complicated. You just need to know what you’re doing and keep up with it. This guide covers everything: routine cleaning, deep cleaning, sealing, repairs, and when it’s time to call in a professional.
Understanding Grout: What It Is and Why It’s Vulnerable
Before you can maintain grout properly, it helps to understand what you’re dealing with.
Grout is a cement-based (or epoxy-based) material that fills the joints between tile. Its job is to hold tiles in place, prevent moisture from getting underneath, and give the floor a finished look. The most common type—cement grout—is naturally porous, which means it absorbs liquids, soap residue, cleaning product buildup, and airborne grease over time. That absorption is what causes grout to darken, stain, and eventually grow mold or mildew.
Sanded vs. Unsanded Grout
You’ll encounter two main types of cement grout:
- Sanded grout contains fine sand aggregate and is used for joints wider than 1/8 inch. It’s common on floor tile and larger-format installations. It’s more durable but slightly rougher in texture, which means it can trap more dirt.
- Unsanded grout is smoother and used for narrow joints—typically on wall tile, backsplashes, and polished stone. It’s more prone to shrinking and cracking in wider joints.
- Epoxy grout is a third option that’s increasingly popular in new installations. It’s non-porous, highly stain-resistant, and doesn’t require sealing. If you’re choosing grout for a new tile floor or renovation, it’s worth asking your installer about epoxy—particularly for kitchens and bathrooms.
Routine Grout Cleaning: What to Do Every Week
The single best thing you can do for grout is prevent buildup from accumulating in the first place. A consistent routine keeps grout looking fresh and dramatically reduces the need for heavy cleaning later.
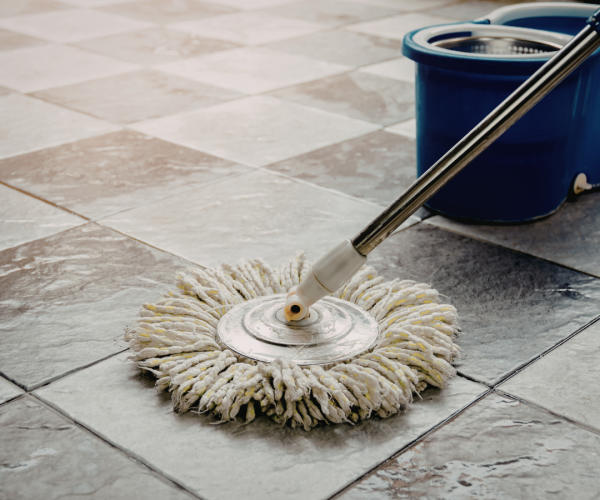
Weekly Sweep and Mop
Sweep or vacuum tile floors before mopping. Dragging loose grit across tile with a mop scratches the surface over time and pushes debris deeper into grout joints. Use a soft-bristle broom or a vacuum with a hard-floor setting.
When mopping, use a pH-neutral floor cleaner. This is important: acidic cleaners (vinegar, lemon-based products) and harsh alkaline cleaners both degrade cement grout over time. Many popular multi-surface cleaners are too strong for regular grout use. Look for products labeled pH-neutral or specifically designed for tile and grout.
Use a damp mop—not a soaking wet one. Excess water sitting in grout joints promotes mildew growth, particularly in Florida’s humidity.
Wipe Spills Immediately
Grout stains fastest from red wine, coffee, cooking grease, and anything acidic like tomato sauce or citrus juice. Blot spills immediately with a clean cloth rather than wiping, since wiping spreads the liquid into adjacent grout joints.
Deep Cleaning Grout: How to Actually Remove Stains and Buildup
Even with good weekly habits, grout needs a deeper clean two to four times a year depending on location and traffic level. Here’s what actually works.
The Baking Soda and Peroxide Method
This is one of the most effective DIY grout cleaners and won’t damage your grout or tile.
- Mix baking soda with hydrogen peroxide (3%) into a paste—roughly 2 parts baking soda to 1 part peroxide.
- Apply the paste directly to grout lines with an old toothbrush or a dedicated grout brush.
- Let it sit for 5–10 minutes, then scrub in small circular motions.
- Rinse thoroughly with warm water.
This method works well on most surface staining and general dullness. It’s safe for sealed and unsealed cement grout.
What to Avoid
Many homeowners reach for bleach or bleach-based bathroom sprays when grout looks bad. Bleach can lighten grout temporarily, but it also breaks down the cement binder over time and accelerates deterioration. In Florida’s humid environment, that breakdown speeds up even more. Use bleach sparingly and only when other methods haven’t worked—and always rinse thoroughly afterward.
Steam cleaners are effective for deep cleaning grout without chemicals, but avoid them on epoxy grout or any tile installed with a membrane system, as the heat can compromise the bond.
Avoid wire brushes. They scratch tile surfaces and damage grout structure. A stiff nylon brush is all you need.
Dealing With Mold and Mildew in Grout
In bathroom and kitchen grout, mold and mildew are common—particularly in Tampa Bay’s humidity. Black or green discoloration in grout lines that doesn’t respond to regular cleaning is almost always mold.
- For surface mold: A paste of baking soda and a small amount of dish soap, scrubbed with a nylon brush, handles most cases. Rinse thoroughly.
- For deeper mold: A diluted solution of one part bleach to ten parts water, applied carefully with a brush, left for five minutes, and rinsed completely can reach mold that’s penetrated deeper into unsealed grout. Ventilate the room well during application.
If mold keeps coming back despite cleaning, the issue is usually inadequate sealing or a moisture problem behind the tile—a slow leak, inadequate ventilation, or missing waterproof membrane. Recurring mold is a signal to call a professional.
How to Seal Grout (And Why It’s Not Optional in Florida)
Sealing is the most overlooked part of tile maintenance, and it’s especially critical in a humid climate. A quality grout sealer penetrates the porous cement and creates a barrier that repels moisture, oils, and staining agents before they can absorb in.
In Tampa Bay—where humidity is high year-round and bathrooms and kitchens are constantly exposed to steam and moisture—unsealed grout is a liability.
What Type of Sealer to Use
- Penetrating sealers (also called impregnating sealers) soak into the grout and create an invisible barrier without changing the grout’s appearance. This is the most common type for floor tile and what most professionals recommend.
- Topical (membrane-forming) sealers sit on top of the grout surface and create a visible coating. They wear off faster in high-traffic areas and can look shiny or plastic. Generally not recommended for floors.
For most Tampa Bay tile floors, a penetrating sealer is the right choice.
How to Seal Grout Step by Step
- Make sure grout is completely clean and dry. Sealing over dirty or damp grout locks in the problem. If you’ve just deep-cleaned, wait 24 hours before sealing.
- Apply the sealer along grout lines using an applicator bottle, small foam brush, or the roller applicator included with many products. Work in small sections.
- Let the sealer penetrate for the time specified on the product label—typically 5–15 minutes.
- Wipe away any excess sealer from tile surfaces with a clean cloth. If sealer dries on tile, it can leave a hazy film that’s difficult to remove.
- Apply a second coat for new or previously unsealed grout, or anywhere that absorbed the first coat quickly.
- Allow full cure time before mopping or exposing the surface to water—usually 24–72 hours, depending on the product.
How Often Should You Seal?
For most floor tile, sealing every 1–2 years is sufficient. Bathroom and kitchen grout that receives heavy daily moisture exposure should be sealed annually.
Quick test: Drop a few beads of water on your grout. If the water absorbs quickly (within a minute or two), it’s time to reseal. If the water beads and sits on the surface, the sealer is still doing its job.
Grout Repair: When Cleaning Isn’t Enough
Over time—especially in older Florida homes that have experienced water damage, settlement, or simply years of use—grout can crack, crumble, or pull away from tile edges. At that point, cleaning and sealing won’t solve the problem.
Hairline Cracks
Small surface cracks that haven’t opened up significantly can often be addressed with a grout repair pen or by working new grout into the crack, feathering it to match the surrounding joints. This is a manageable DIY fix for isolated problem areas.
Crumbling or Missing Grout
When grout is crumbling out of joints, the answer is regrouting—removing the old material and applying fresh grout. This involves using a grout saw or oscillating tool to carefully remove the damaged grout without disturbing the tile, cleaning the joint, and then applying new grout matched to the existing color.
For large areas or anywhere near a tub or shower, a professional installation ensures proper waterproofing.
Grout Discoloration That Won’t Respond to Cleaning
If grout is deeply stained through to the core—common in older homes or neglected bathrooms—regrouting is often the most practical solution. Grout colorant products exist and can revive the look of stained grout without full removal, but results vary. For a floor or shower that hasn’t been maintained in years, regrouting gives you a fresh, clean starting point with a properly sealed finish.
Special Considerations for Florida Homes
A few grout and tile maintenance issues show up more frequently in Tampa Bay homes than in other parts of the country.
Mold Behind Shower Tile
In Florida’s humidity, shower enclosures that weren’t built with a proper waterproof membrane behind the tile can allow moisture to penetrate the wall over time. Signs include grout that stays discolored no matter how many times you clean it, soft spots in the wall near the shower, or musty odors.
If you’re experiencing this, the fix isn’t cleaning—it’s a bathroom renovation that includes proper waterproofing.
Efflorescence (White Chalky Deposits)
Efflorescence is the white or grayish powdery residue that sometimes appears on tile and grout—particularly in Florida homes built on or near the water table. It happens when water moves through concrete or grout and deposits mineral salts on the surface as it evaporates.
Efflorescence can be cleaned with a diluted white vinegar solution (used sparingly on cement grout and rinsed immediately and thoroughly) or a dedicated efflorescence remover.
Addressing the underlying moisture source is the long-term fix.
Large-Format Tile and Grout Lines
Larger tile formats (24×24 and up) have become very popular in Tampa Bay homes. One of their practical advantages is minimal grout—less grout means less surface to maintain and seal.
If you’re planning a new tile floor or bathroom renovation, large-format tile is worth discussing with your installer.
Grout Maintenance Quick Reference
- Routine mopping: Weekly using a pH-neutral cleaner only
- Deep cleaning: Every 3–4 months using a baking soda and hydrogen peroxide paste
- Grout sealing: Annually for bathrooms and kitchens; every 1–2 years for other areas
- Water bead test: Check sealer condition every six months
- Spill response: Blot immediately—don’t let liquids sit in grout joints
- Grout repair: Address cracks and missing grout before resealing
- Professional assessment: If mold keeps returning or grout is failing near water areas
When to Call a Professional
Most grout maintenance is something homeowners can handle themselves. But there are situations where calling a flooring professional is the smarter move.
- Grout failure near showers, tubs, or floor drains – Water infiltration behind tile can cause significant structural damage if left unaddressed.
- Large-scale regrouting projects – Removing and replacing grout across an entire floor or bathroom requires specialized tools and technique to avoid damaging tile.
- Tile that’s coming loose – When individual tiles start to crack or lift, the subfloor or adhesive underneath may be compromised. This is beyond a grout issue and needs a professional evaluation.
- You’re planning a renovation anyway – If your bathroom or kitchen tile is aging, this is the time to consider whether regrouting buys you more years or whether a fresh tile installation is the better long-term investment.
Contact Yeager Flooring for a free estimate.
The Bottom Line
Tile floors are one of the best investments you can make in a Tampa Bay home—and grout is the one part of that investment that needs consistent attention to stay looking its best. Clean it regularly with the right products, seal it on schedule, and address small repairs before they become big ones. Done right, a well-maintained tile floor can last for decades.
If you’re dealing with grout that’s beyond saving, planning a bathroom or kitchen renovation, or just looking at new tile for your home, Yeager Flooring has been helping Tampa Bay homeowners make smart flooring decisions since 1944. We offer free estimates, and our Shop at Home service brings samples directly to you.
Frequently Asked Questions
How do I get grout white again?
Start with a baking soda and hydrogen peroxide paste. Apply it to grout lines, let it sit for 5–10 minutes, scrub with a nylon brush, and rinse thoroughly. For grout that won’t respond to cleaning, a grout colorant or grout pen can restore the appearance without full removal. If grout is deeply stained throughout, regrouting is the most reliable solution for a clean, lasting result.
Does vinegar clean grout?
Vinegar is mildly acidic and can break down some surface staining, but it also gradually degrades cement grout if used regularly.
It should not be your routine grout cleaner.
Stick to pH-neutral cleaners for regular maintenance. Occasional diluted use, rinsed immediately and thoroughly, won’t ruin grout—but it’s not recommended as a go-to method.
How do I know if my grout is sealed?
Drop a few beads of water onto your grout. If the water absorbs into the grout within a minute or two, the sealer has worn off and resealing is needed. If the water beads and sits on the surface, the sealer is still doing its job.
How long does grout sealer last?
Most penetrating sealers last 1–2 years on floor tile under normal use. Bathroom and kitchen grout exposed to daily moisture may need annual resealing. High-traffic areas wear sealer faster. The water bead test is the most reliable way to determine when resealing is due.
Can I regrout over existing grout?
In most cases, no. Grout should be fully removed before applying fresh grout for the best result. Old grout that’s crumbling or discolored won’t bond well with new material, and a thin layer of new grout over old tends to crack and come loose quickly. Proper regrouting involves removing the old material with a grout saw, cleaning the joint, and applying fresh grout.
When should I replace tile instead of just regrouting?
Regrouting is usually sufficient when the tile itself is in good shape—no cracks, no loose tiles, and no moisture damage underneath. If tiles are cracking, multiple tiles are loose, or there are signs of water damage beneath the tile, replacement is the right move. A professional inspection can determine which situation you’re dealing with.
About the Author: Jim Yeager, Flooring & Remodeling Expert